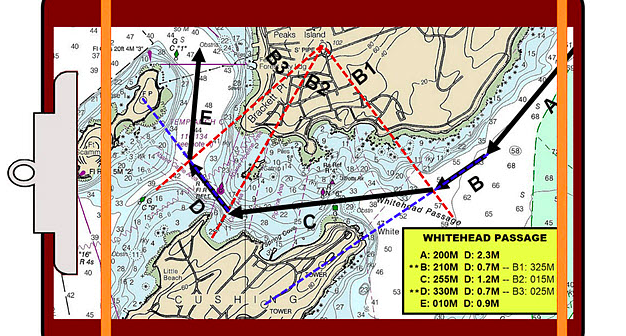
In an age of sophisticated electronics and digital course plotting, it’s all too easy to overlook the basics of coastal navigation. Here are seven tips from Skipper Tips that can serve as a refresher course to keep you and your crew safe on your next cruise:
1. Double-check Courses.
Parallel rules and protractors tend to slip when underway. Just a slight bit of slippage could throw a course or bearing off by several degrees. Take the extra step and measure your plotted course twice. If both measurements agree, you will know you’re right!
2. Keep Bearing Spreads to 60-90-120.
Shoot two or more bearings with a minimum angle of 60 degrees between the objects. This will reduce errors and gives a more solid fix. If you shoot just two objects, the best spread between objects will always be 90 degrees. With two objects the maximum angle should never exceed 120 degrees. Scan your nautical chart ahead of time; find and highlight objects you can use for bearings. This will make your plotting faster, easier, and more fun.
3. Measure Distance with Care.
Because chart projections have some error after being flattened from a 3-dimensional image, distances can distort. This becomes more critical on charts with smaller scales, such as those used in coastal or offshore navigation. Measure distances on the Latitude scale adjacent to your current position for more accuracy.
For example, let’s say you are navigating on an offshore chart with a scale of 1:250,000. If you are located in the center of the chart, measure distances from the central part of the latitude scale. If located near the top of the chart, use the latitude scale near the top to measure distances. If located near the lower part of the chart, use the latitude scale near the lower part of the chart to measure distances. This gives you more accurate distance measurements for planning, provisioning, determining arrival times, and for the conservation of water and fuel.
4. Shoot Bearings Ahead or Astern First.
Take visual bearings on objects near the bow or stern first. Bearings to these objects change slowest as you move through the water. Take visual bearings to objects near the beam last. Bearings to these objects change fastest. Mark the time of the position when you have taken the final beam bearing. Enter the time of the fix into the navigation log along with your bearings. This allows you to reconstruct your path over the earth’s surface and provides a historical and legal record of your vessel’s journey.
5. Become Plotting Compass Savvy.
Learn to become super proficient with the plotting compass (also called a “drafting compass”). This tool has a needle point on one leg and a small sliver of pencil lead on the other. Few navigation tools are more versatile. Choose a compass about 7″ long overall for comfort and fast, accurate plotting.

Use the plotting compass to plot Latitude and Longitude one-handed, swing an arc from a radar range, or project a series of Dead Reckoning positions ahead of your last known position–with a simple sweep of the pencil lead across the course line.
Some navigators might prefer dividers–a navigation tool that has a needle point in the end of each leg. But dividers require a separate pencil for plotting. The plotting compass does twice the work in half the time!
6. Know Your Soundings.
Before you start to use any nautical chart, find out what the soundings mean. Look under the title of the chart (title block area) and on the top or bottom margins. Your chart will say Soundings in Feet, Soundings in Meters, Soundings in Feet and Meters, or Soundings in Fathoms. These are the most common soundings used on nautical charts.
For example, let’s say you see a sounding of 2 on your chart. Does this mean 2 feet, 2 fathoms (12 feet), or 2 meters (6 ½ feet)? Never assume one chart’s soundings are the same as another. Always check the title block and chart margins first before you start to navigate. Pass on this vital information to your sailing crew.
7. Allow for Leeway Error.
Sailing vessels slip sideways (called “leeway”) when beating or reaching. There are fancy calculations to determine leeway but always work your way upwind of your intended destination to account for unexpected wind shifts or navigation errors. Some navigators like to set their course two to three miles upwind or up-current on purpose. This gives them a good margin of safety and allows them to fall off to a reach or run to the final destination. Read more:


